Some links on this Website are affiliate links, meaning we may earn a commission if you make a purchase, at no additional cost to you. Please read our full Affiliate Disclosure for more details.
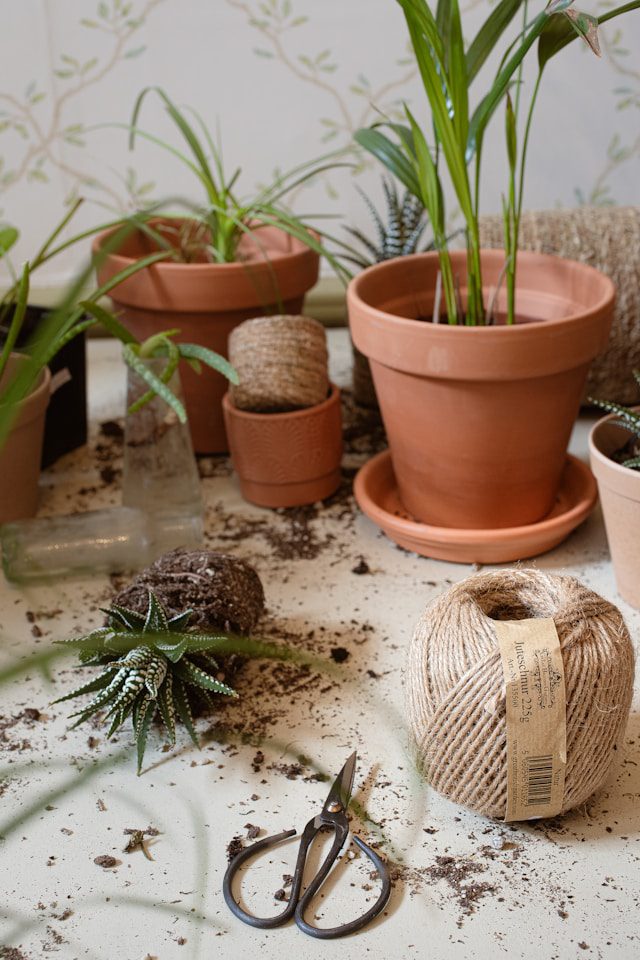
Repotting is one of the most important steps in keeping indoor and outdoor plants healthy. Over time, plants outgrow their containers, soil loses nutrients, and root systems become cramped. Repotting gives plants a fresh start, but when done incorrectly, it can stress the plant and even lead to long-term damage.
Many gardeners unknowingly make the same repotting mistakes, which slow down plant growth instead of encouraging it. By understanding these common errors and how to avoid them, you’ll set your plants up for success and help them thrive in their new environment.
Avoid These Repotting Mistakes to Keep Your Indoor Plants Healthy
Choosing the Wrong Pot Size
A common error most gardeners make is picking the wrong pot size. When you choose a pot that’s too big, the soil around the roots holds water for longer periods, creating soggy conditions that encourage root rot and fungal diseases. On the other hand, if the pot is too small, your plant quickly becomes root-bound, meaning the roots coil tightly and can’t absorb enough nutrients or water.
How to Avoid It: The safest rule is to increase pot size by just one to two inches in diameter compared to the current pot. This ensures the plant has enough room to grow without overwhelming the roots with excess soil. For fast-growing plants, such as monsteras or rubber trees, this gradual increase keeps growth healthy and balanced.
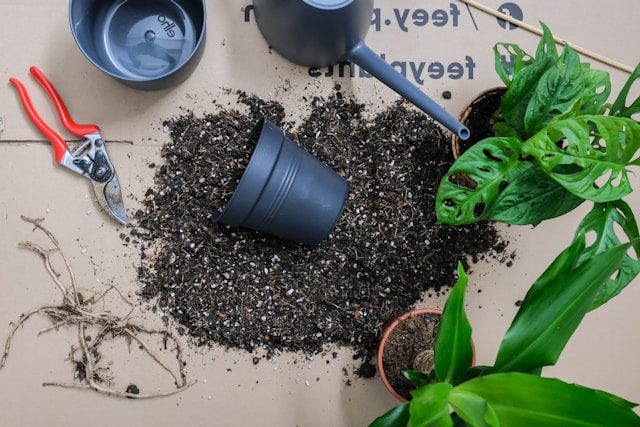
Using the Wrong Potting Soil
Another frequent repotting mistake is using soil that isn’t suitable for the plant’s needs. Garden soil, for instance, is often too heavy and can suffocate delicate roots. Reusing old potting soil is also risky because it may lack nutrients and could harbor pests, mold, or disease. Each plant species has specific soil requirements, and ignoring these can stunt growth.
How to Avoid It: Always invest in fresh, well-draining potting mix. Match the soil to your plant type—succulents and cacti prefer gritty, sandy soil that drains quickly, while tropical houseplants thrive in nutrient-rich, airy mixes with organic matter like peat moss or coco coir. A fresh mix not only supports healthy root growth but also reduces the chances of introducing pests or fungi.
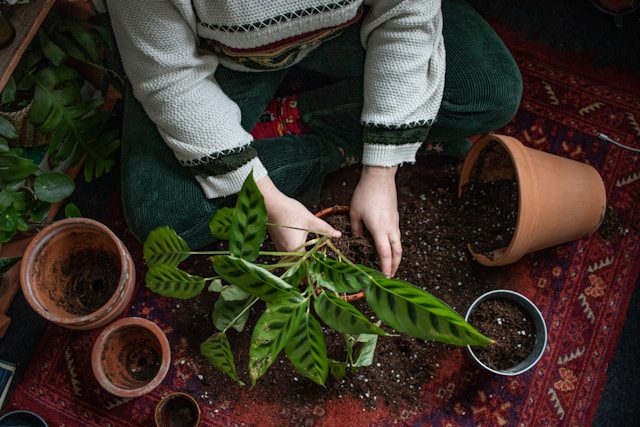
Ignoring Root Health Before Repotting
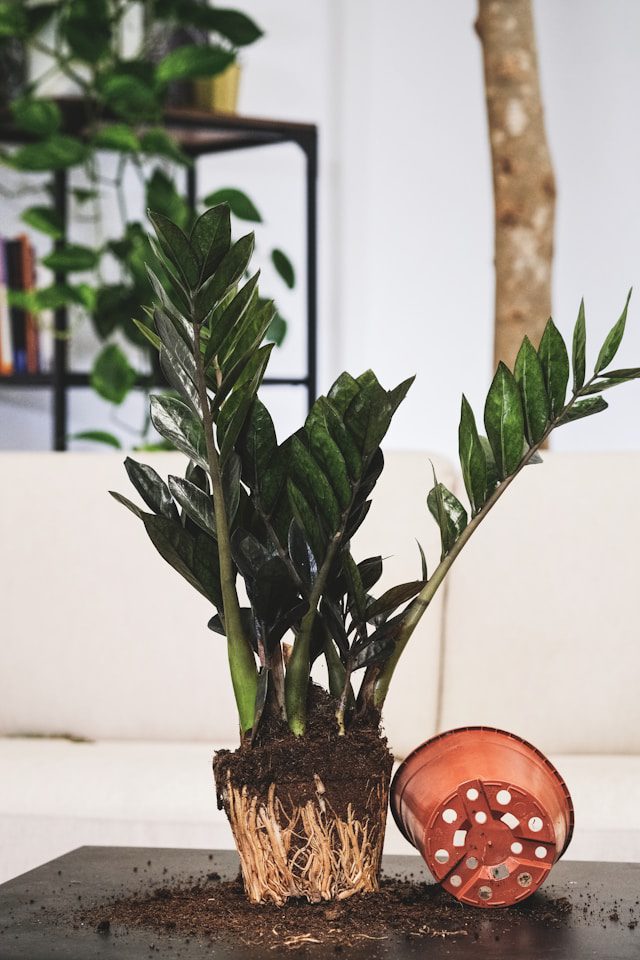
When plants become root-bound, the roots form dense circles at the bottom and sides of the pot. One of the most overlooked repotting mistakes is transferring a plant into a new container without loosening or trimming these compacted roots. This prevents the roots from spreading into the fresh soil, leaving the plant unable to absorb water and nutrients efficiently.
How to Avoid It: Before placing your plant into the new pot, inspect the root ball carefully. If the roots are circling tightly, gently tease them apart with your fingers. In extreme cases where the roots are heavily tangled, prune them slightly with sterilized scissors. This encourages new root growth into the fresh soil and helps the plant establish faster in its new pot.
Repotting at the Wrong Time
Timing is critical when repotting, and many gardeners make the mistake of doing it when the plant is least ready. Repotting during dormancy, flowering, or extreme seasonal changes can shock the plant. For example, repotting a blooming orchid may cause it to drop its flowers prematurely, while repotting in winter often slows down recovery because the plant isn’t actively growing.
How to Avoid It: The best time to repot is during the plant’s active growing season, usually in spring and early summer. During this time, plants produce new roots and leaves, which makes it easier for them to recover from the stress of repotting. Avoid disturbing plants that are blooming or adjusting to environmental stress, such as sudden temperature changes.
Tips to Make a Jade Plant Bloom
Overwatering After Repotting
Many gardeners assume that giving a newly repotted plant a heavy drink of water will help it adjust, but this often backfires. Freshly disturbed roots are sensitive, and too much water can suffocate them, leading to root rot. Since the soil is new, it already holds more moisture than older, compacted soil.
How to Avoid It: After repotting, water sparingly; just enough to settle the soil around the roots. Then, let the soil dry slightly before watering again. Follow your plant’s natural watering schedule rather than assuming it needs extra water. For example, succulents may need a longer drying period, while leafy tropicals may require more frequent but moderate watering.
How Many Lumens do Plants Need?
Forgetting About Drainage
Using a pot without drainage holes is one of the most harmful repotting mistakes. Without proper drainage, excess water collects at the bottom of the container, drowning the roots and creating perfect conditions for fungal growth. Even experienced gardeners sometimes prioritize decorative pots over functional ones, putting the plant at risk.
How to Avoid It: Always choose pots with drainage holes. If you love a decorative pot that doesn’t have them, place your plant in a plastic nursery pot with drainage and then set it inside the decorative container. Adding a layer of pebbles at the bottom won’t replace proper drainage: it only delays waterlogging.
Handling Plants Roughly During Repotting
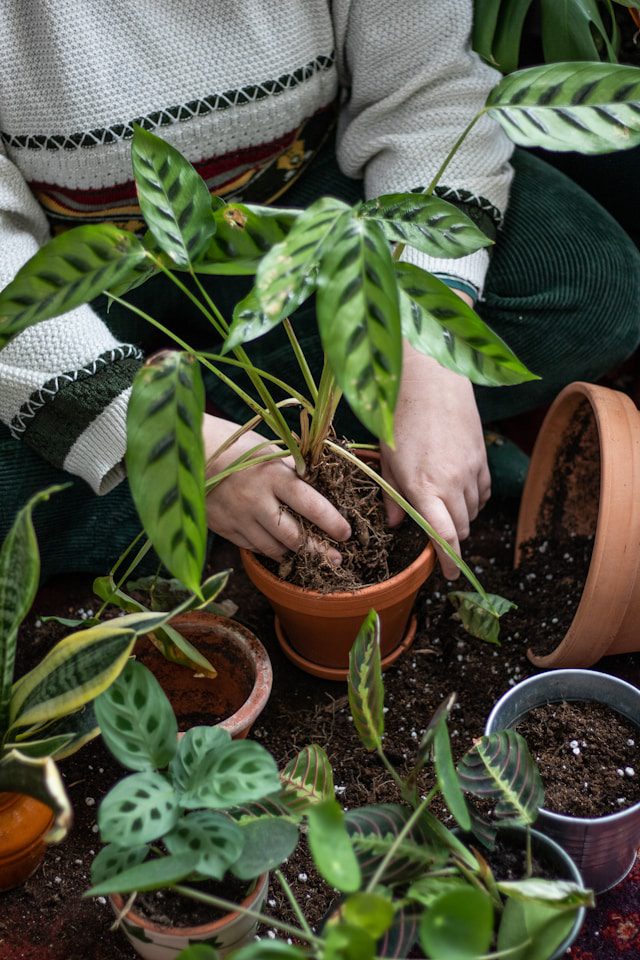
Plants can be surprisingly delicate, and one of the mistakes many gardeners make is handling them too roughly. Yanking on the stem, squeezing the pot excessively, or breaking large roots can stress the plant and slow down its ability to adapt to the new environment.
How to Avoid It: Be patient and gentle during the process. Support the base of the plant as you slide it out of the old pot. If the plant is stuck, tap the sides of the pot or squeeze it lightly (if it’s plastic) to loosen the root ball. When trimming roots, use sterilized tools to avoid spreading disease.
Skipping Aftercare
Repotting doesn’t end once the plant is in its new container. A big repotting mistake is failing to give plants proper aftercare. Plants may experience transplant shock, which can cause temporary drooping or slowed growth. Without the right care afterward, the plant may take longer to bounce back.
How to Avoid It: Place the repotted plant in a stable environment with adequate light but away from direct harsh sunlight for the first few days. Avoid fertilizing immediately after repotting, since the fresh soil already contains nutrients and the plant needs time to recover. After two to three weeks, you can resume your regular fertilizing schedule.
Top 6 Reasons Why Garden Plants Keep Dying
7 Easy Tips For Growing Plants Indoors
FAQs
1. How often should I repot my plants?
Most houseplants need repotting every 1–2 years. Fast-growing plants may need it more often, while slow growers can stay in the same pot longer. Look for signs like roots growing out of the drainage holes, compacted soil, or slowed growth.
2. What’s the best time of year to repot plants?
The best time to repot is in spring or early summer when plants are in their active growing season. Avoid repotting during winter dormancy or when a plant is flowering, as this can stress the plant.
3. Can I reuse old potting soil when repotting?
It’s not recommended. Old soil may lack nutrients and can harbor pests or fungi. Instead, use fresh, well-draining potting mix suited to your plant type for healthy root growth.
4. Should I water immediately after repotting?
Yes, but lightly. Watering helps settle the soil around the roots, but avoid overwatering, which can lead to root rot. After that, follow your plant’s normal watering schedule.
5. How do I know if my plant is root-bound?
A root-bound plant will have roots circling the pot tightly, pushing up through the soil, or growing out of drainage holes. It may also show signs of stunted growth, yellowing leaves, or drying out quickly after watering.
6. What should I do if my plant looks droopy after repotting?
Don’t panic! This is transplant shock. Keep the plant in a stable environment with indirect light, avoid fertilizing right away, and water only as needed. Within a few weeks, it should perk up.